

A screencast is a versatile medium of communication. It is well suited for recording presentations, meetings, software demos, instructions, lessons and feedback. To record a screencast on a Mac you have two main options for a recording tool:
In this article we cover option #2. A natural question that arises is why use a browser extension when you have an app like QuickTime.
Why use a browser extension instead of an app
A browser extension for screen recording has two main advantages over an app:
- A common case for screen recording is to record a single browser tab. Browser extensions have a special recording mode that lets you record a single tab and tab audio.
- A lot of our work is in the browser so it’s more efficient to launch and create a recording without leaving the browser. A browser extension lets you do that.
How to use a browser extension for screen recording on a Mac
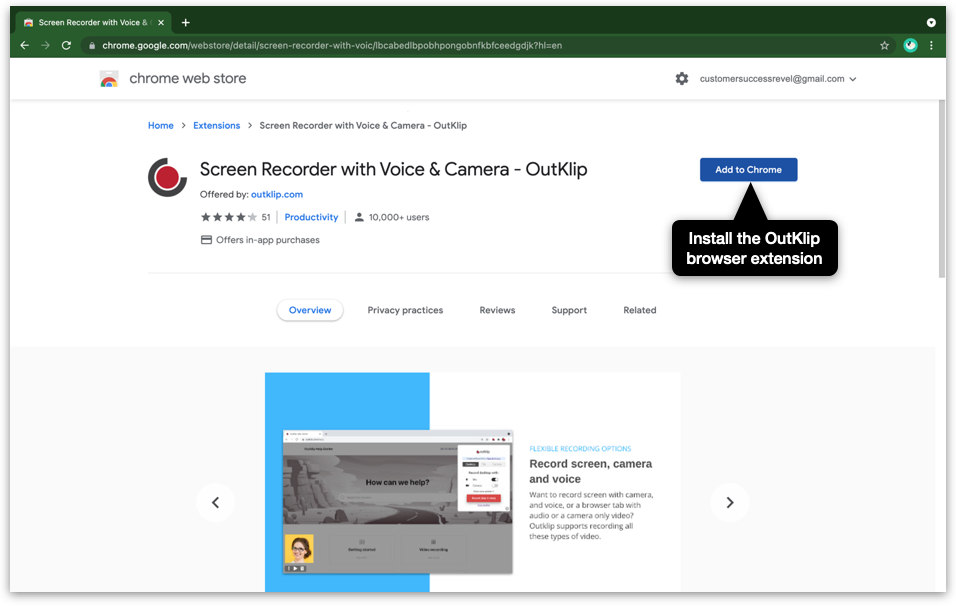
- Install the OutKlip browser extension. If you are using Chrome, Opera or Brave, install the extension from the Chrome web store. If you are using Microsoft Edge, install the add-on from the Edge add-ons store.
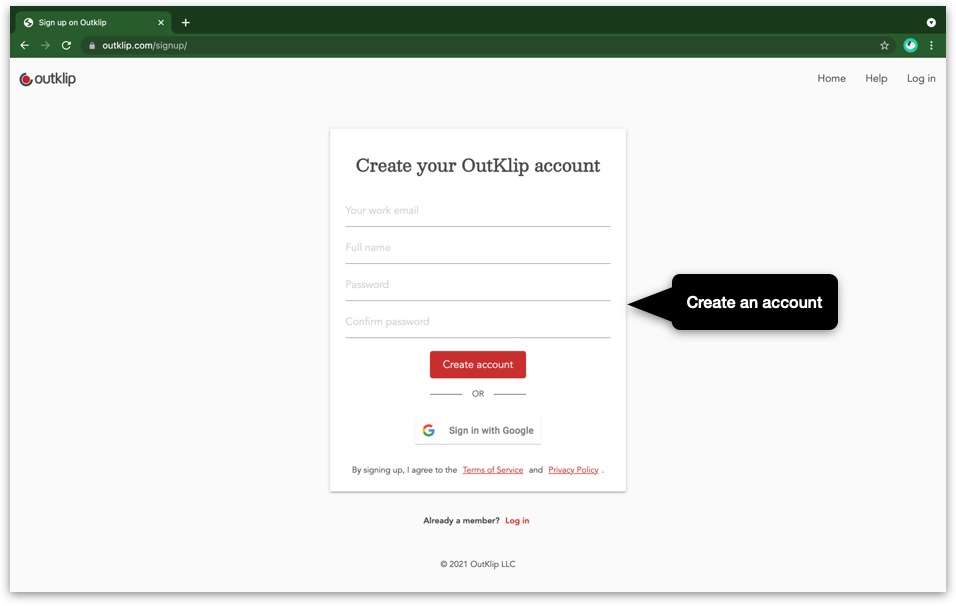
2. Once installed, sign up on outklip.com.
3. Click the OutKlip icon and select the Desktop recording mode to record the entire screen. Select Mic and Camera if you want to record voice and camera.
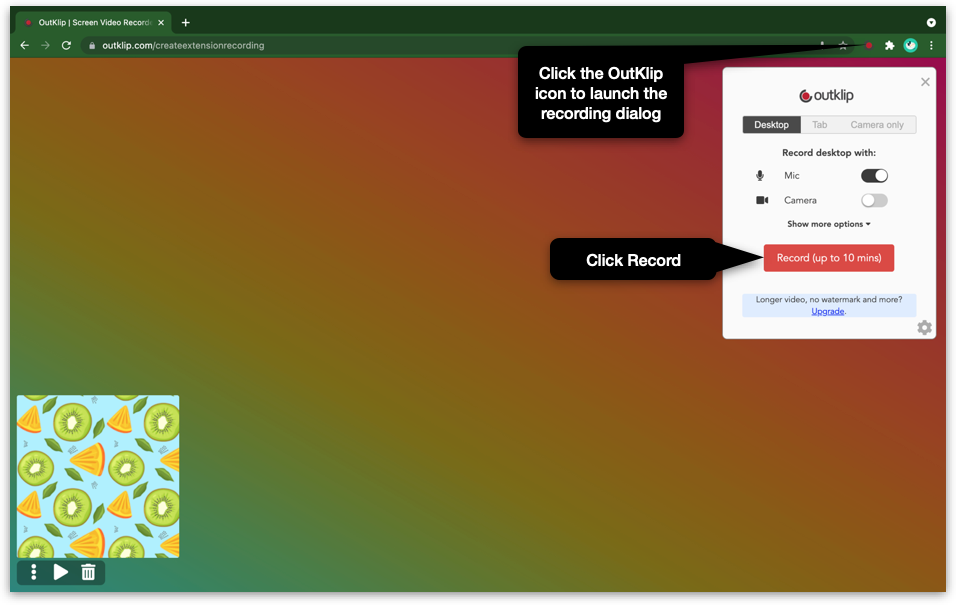
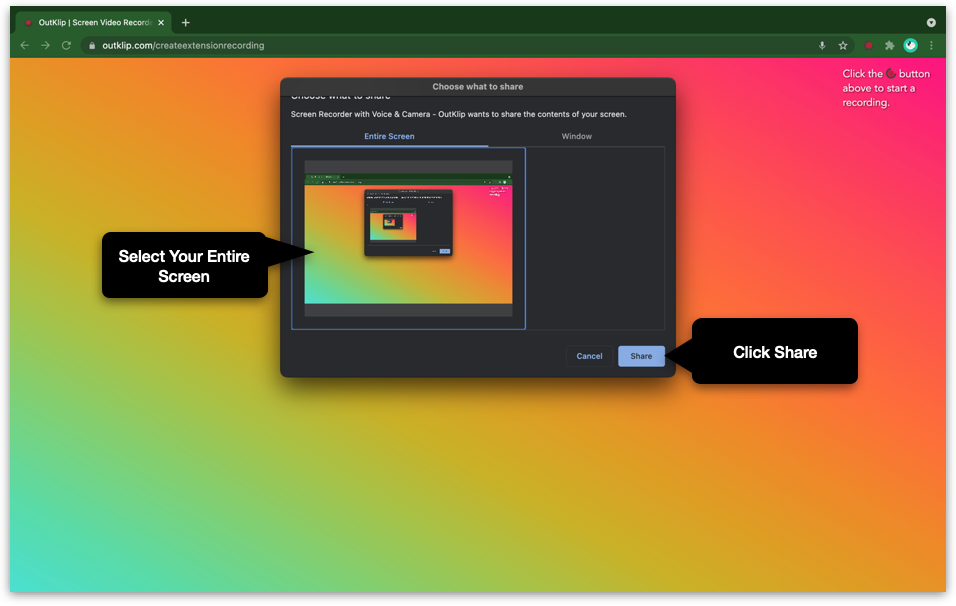
4. Click Record. A Choose what to share dialog will appear. Select Entire Screen and Share.
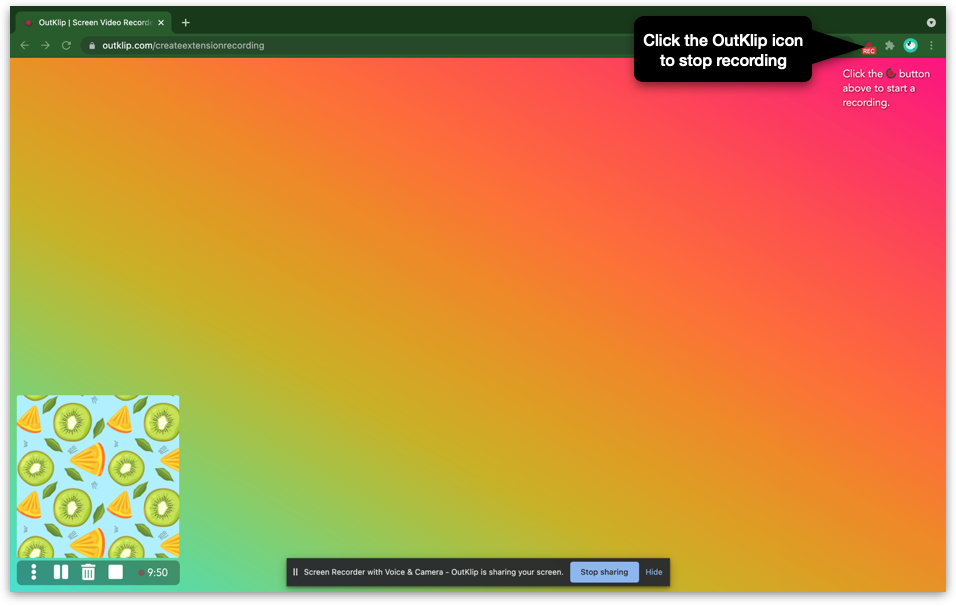
5. Now you’re recording your screen. After you’re done recording, click the OutKlip icon to stop recording.
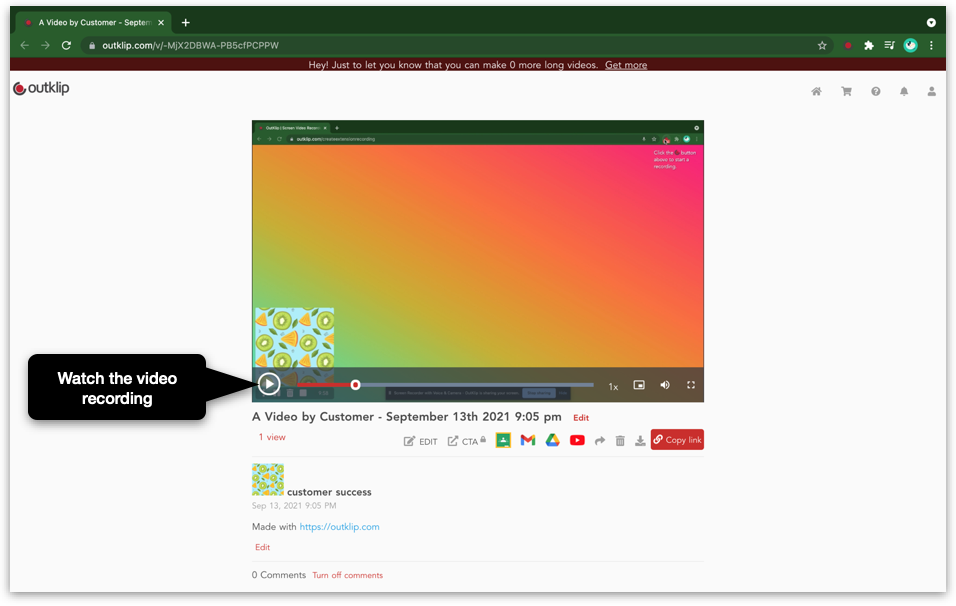
6. A new tab opens with the screencast video you just recorded. Your screencast is ready! Click the play button to watch the video.
Demo video
By combining screen, camera and voice you can create compelling video content that viewers find interesting. By using the OutKlip browser extension, you can create attractive screencasts right in your browser.