


There are many reasons to record a video of your Google Slides presentation. In this guide, I share my process for recording a screencast video of Google Slides.
Things to include in your video
Apart from recording the slides, what else do we need in the video? Let's go through a list of some important things to include in a video.
Audio Narration (voice over)
- Narrate while stepping through slides
- Pros: Makes slides easier to understand and video is more interesting to watch.
- Cons: If you speed up or slow down the video later through editing, the voice over won't sound good. If you are going to edit the video speed, it's better to record video only first and later add a voice-over track.
Camera inset
- Turn your camera on, to be visible during the presentation
- Pros: Camera makes your video look friendly and lends it a unique personal touch. Your video gets better engagement.
- Cons: For the camera video to look good you need proper lighting, background, etc. If you don't have those, consider an alternative to camera: display your profile photo in a corner of the video. This way, even if the video is distributed by others, it has your stamp on it.
Video resolution
- For text to be legible, higher resolution is better. Lower resolution could result in pixelated video.
- Pros: 1080p is the optimal recording resolution. The video will look sharp and text on your slides will be legible.
- Cons: If you don't have 1080p, 720p works fine, but at this resolution, small text might not be legible. Avoid small fonts if recording with 720p.
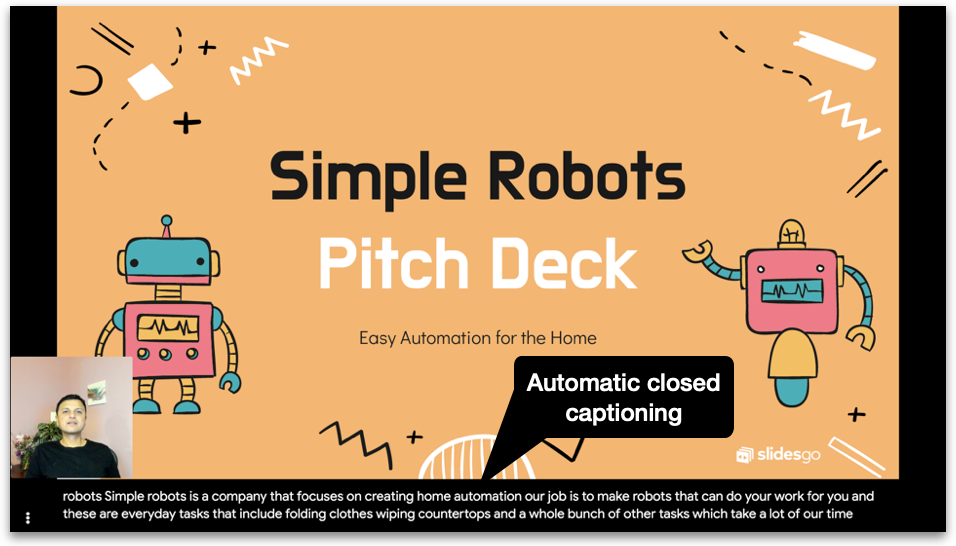
Automatic closed captioning
- While you present, a live speech transcript appears on the video
- Pros: Helps viewers watch the video in mute. Google Slides has in-built automatic closed captioning.
- Cons: The closed captioning accuracy is good but not perfect and might not be able to pick up accents.
Setup you'll needed
In the steps below we'll cover the following:
- record screencast of Google Slides
- with voice over, and
- camera or profile photo inset
- with automatic closed-captioning
Recording equipment
- Laptop or desktop computer
- Webcam (optional, for camera inset)
- Microphone (optional, for voice over / narration)
Software for recording
I'll be using Klip for recording. Klip has certain advantages:
- record nice-looking videos with screen, audio and camera
- easy user interface for daily use
- browser extension that works in Chrome, Edge and compatible browsers
- automatically uploads videos online, so no extra work needed to send people a video link
- in-built video editor
- To note: 720p resolution and 5-minute video recording are free. Upgrade to the Pro plan for 1080p resolution and longer than 5-minute recording.
Steps to record
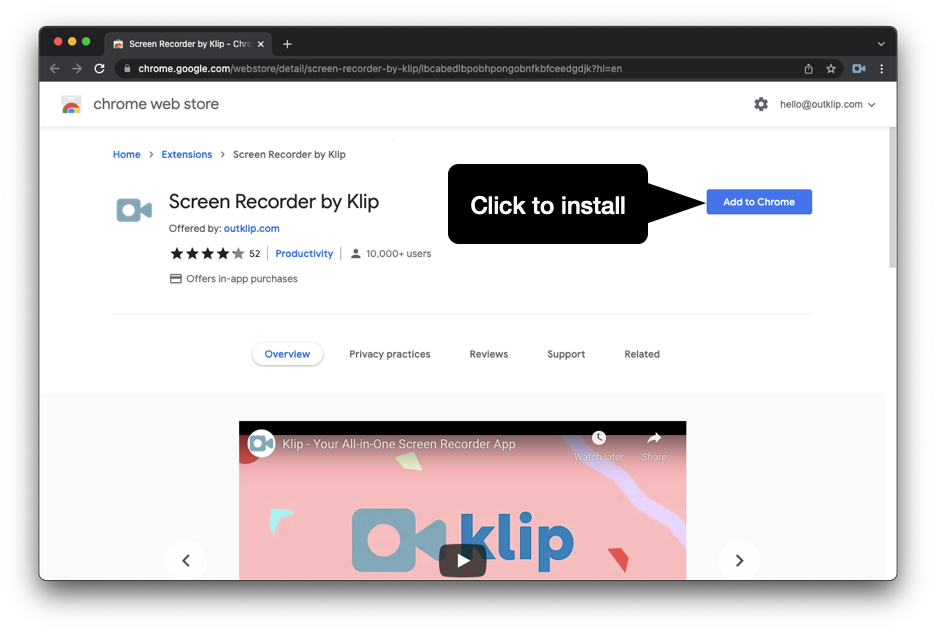
1. Install the browser extension
You can install it for Chrome, Edge and compatible browsers.
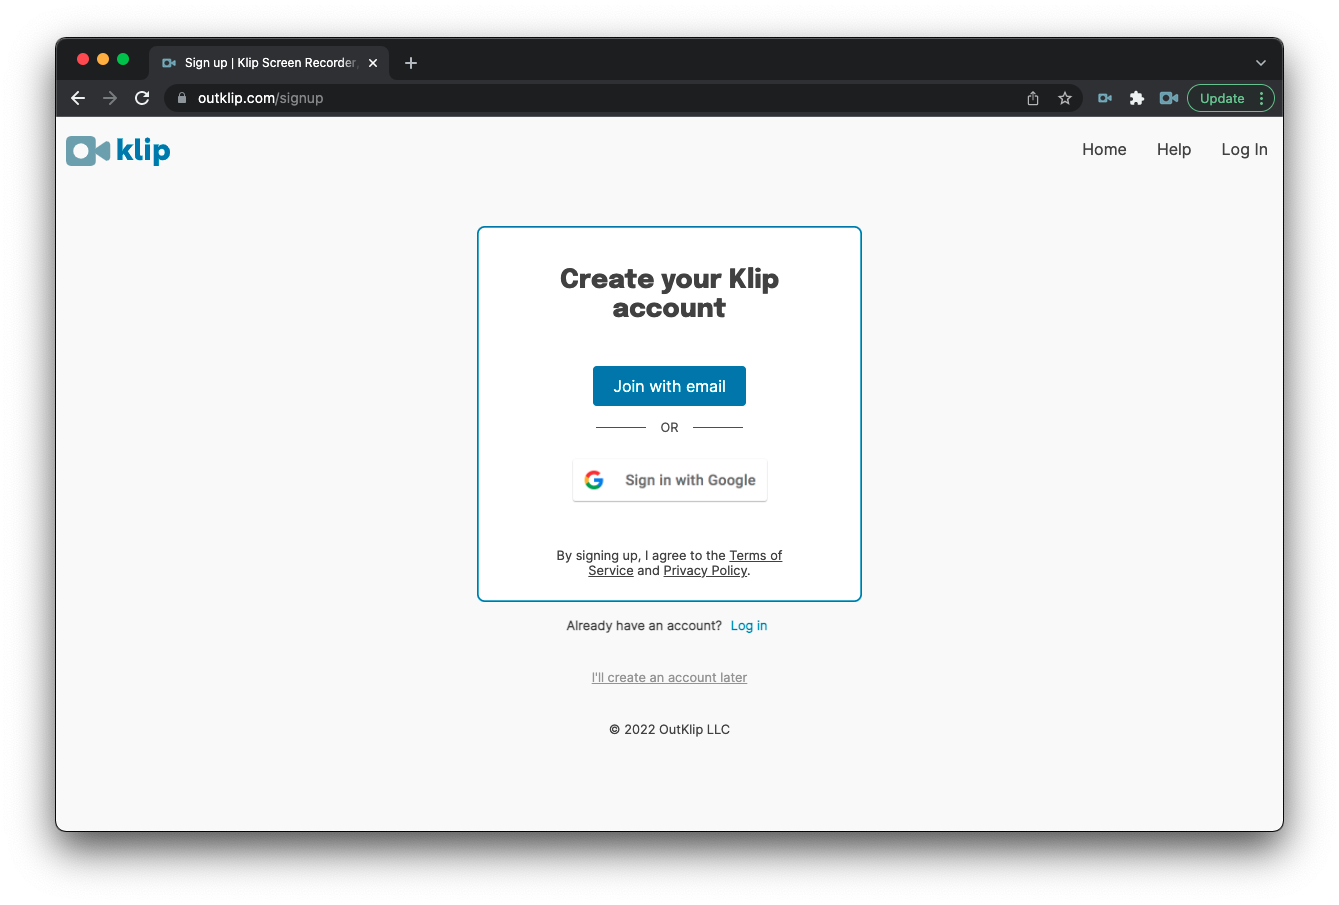
2. Create account on Klip
Sign in is needed as the video is uploaded online. Signing in establishes your ownership of the video, so you can edit the video, delete it, share link, etc.
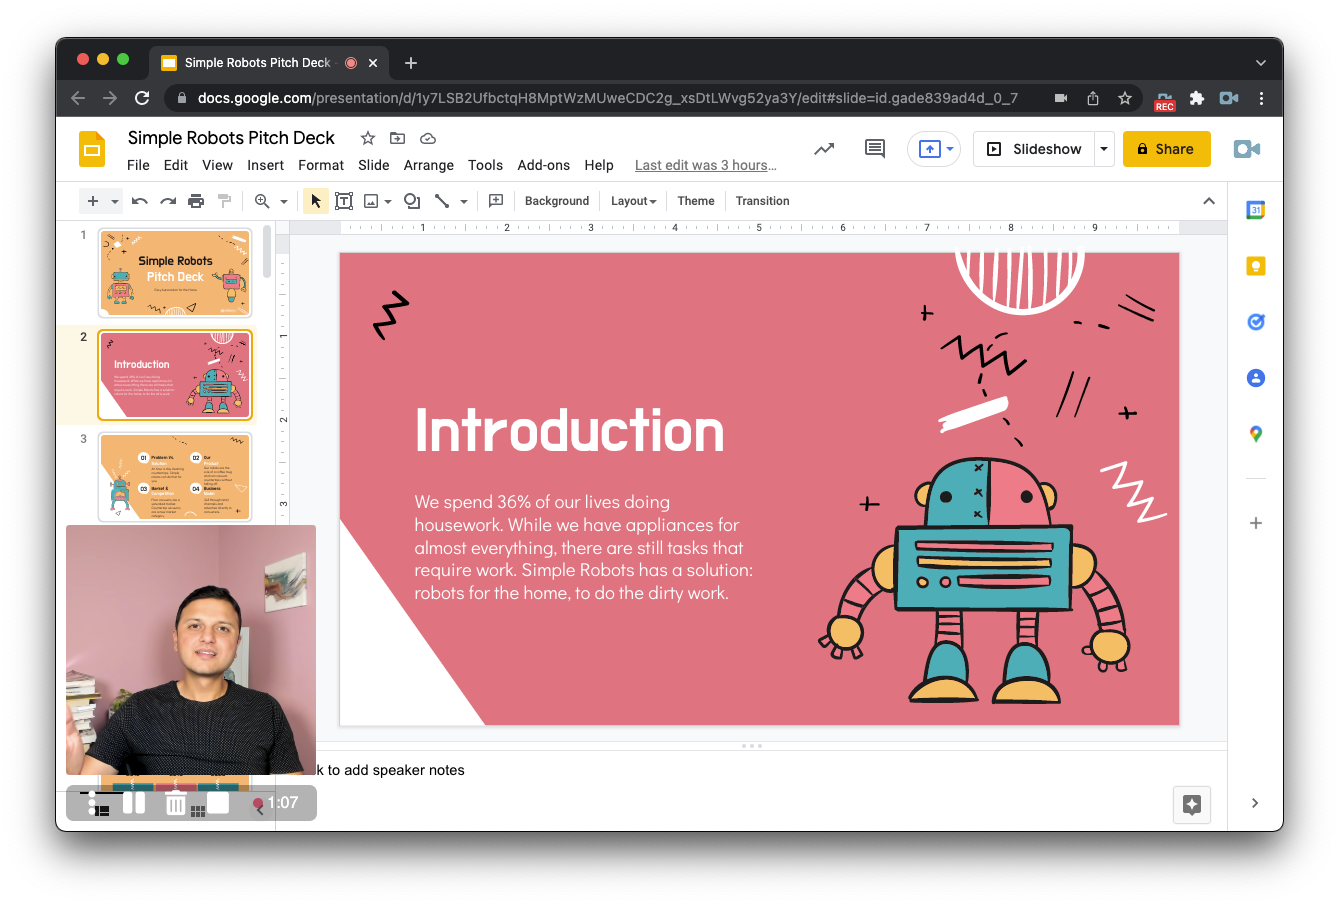
3. Open Google Slides
Go to slides.google.com and open the slide deck to record.
4. Open the recording dialog
Click the Klip extension icon to open the recording dialog.
5. (optional) Enable microphone for narration
Click to turn on mic for recording. If Chrome asks permission to record mic, click Allow.
6. (optional) Enable camera or profile photo
Click to turn on camera for recording. If Chrome asks permission to record camera, click Allow.
If you don't want camera, you could include a profile photo in the recording. Click Show more options on the recording dialog. On the options menu, enable the Profile photo setting. When camera is disabled, your profile photo will appear in the recording. You can customize the profile photo on your Klip account page.
7. Set video recording resolution
On the recording dialog, click Show more options. On the options menu, select the video resolution. Default is 720p. For 1080p, upgrade to Pro.
8. Click Record
Click the Record button on the recording dialog to begin recording.

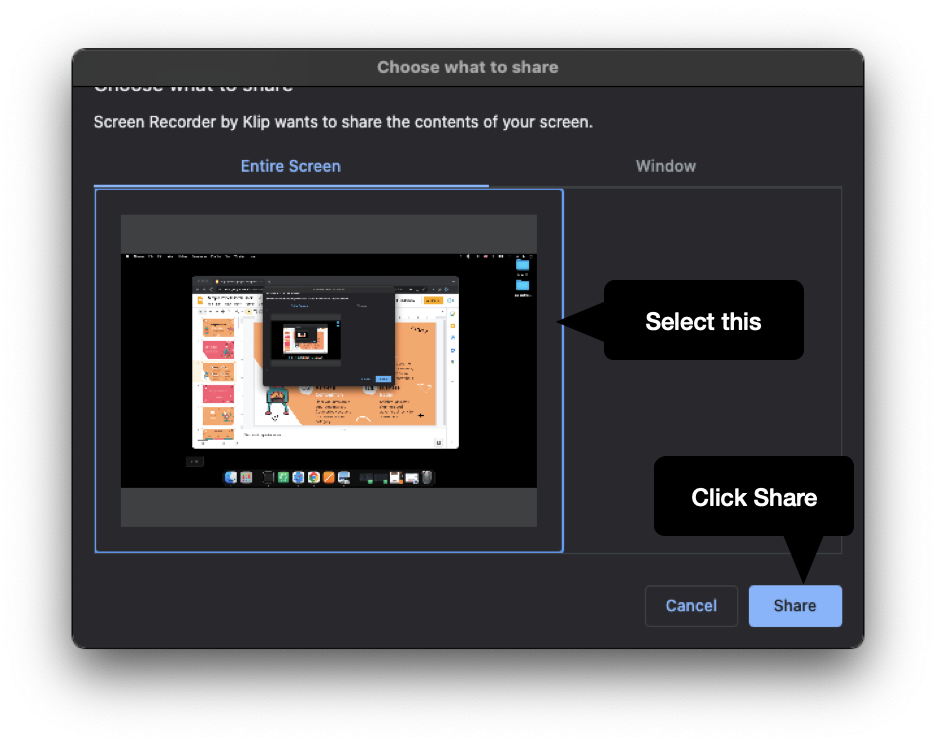
9. Start recording
Select the entire screen for recording and click Share.
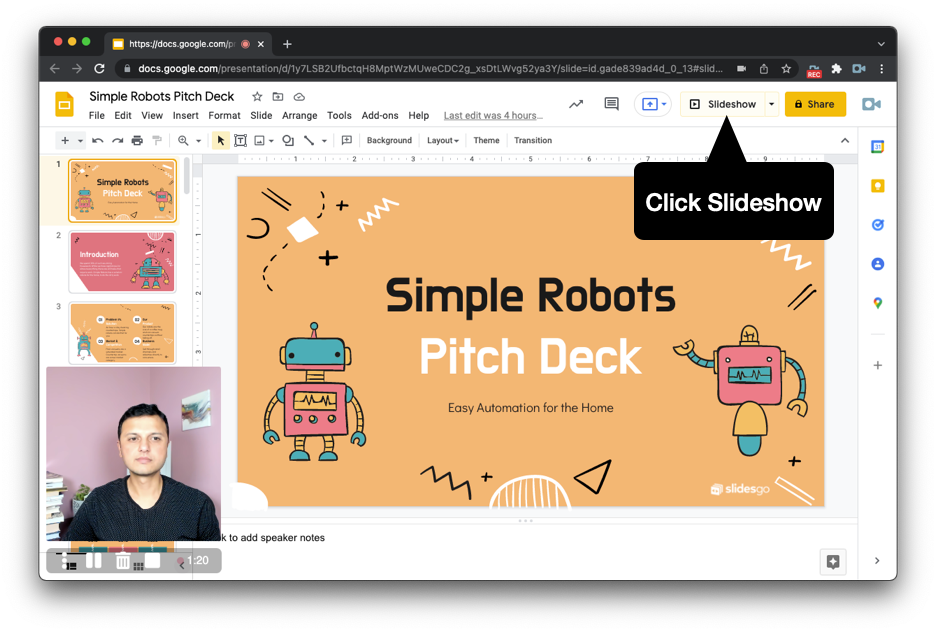
10. Start slideshow
After the countdown, the video is recording. Click Slideshow on your Google Slides presentation, to open it in fullscreen.
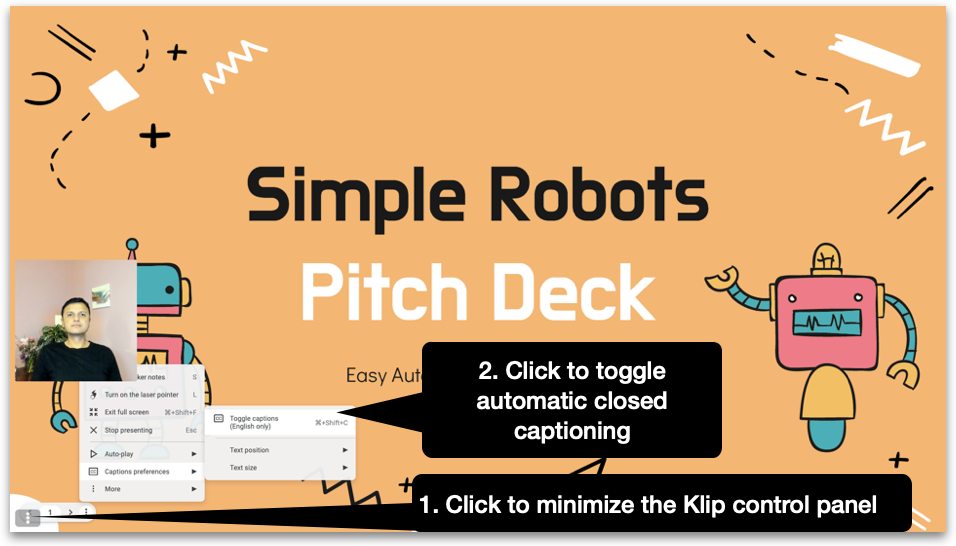
11. (optional) Enable automatic closed-captioning
On the slideshow, minimize the Klip control panel.
Move your mouse to the bottom left of the screen to activate the Google Slides menu. Click the three dots icon on the menu.
Click Captions preferences > Toggle captions to enable automatic closed captioning.
12. Start presenting
Start your presentation and go through your slides.
13. Stop recording
To stop recording, click the stop icon on the Klip control panel.
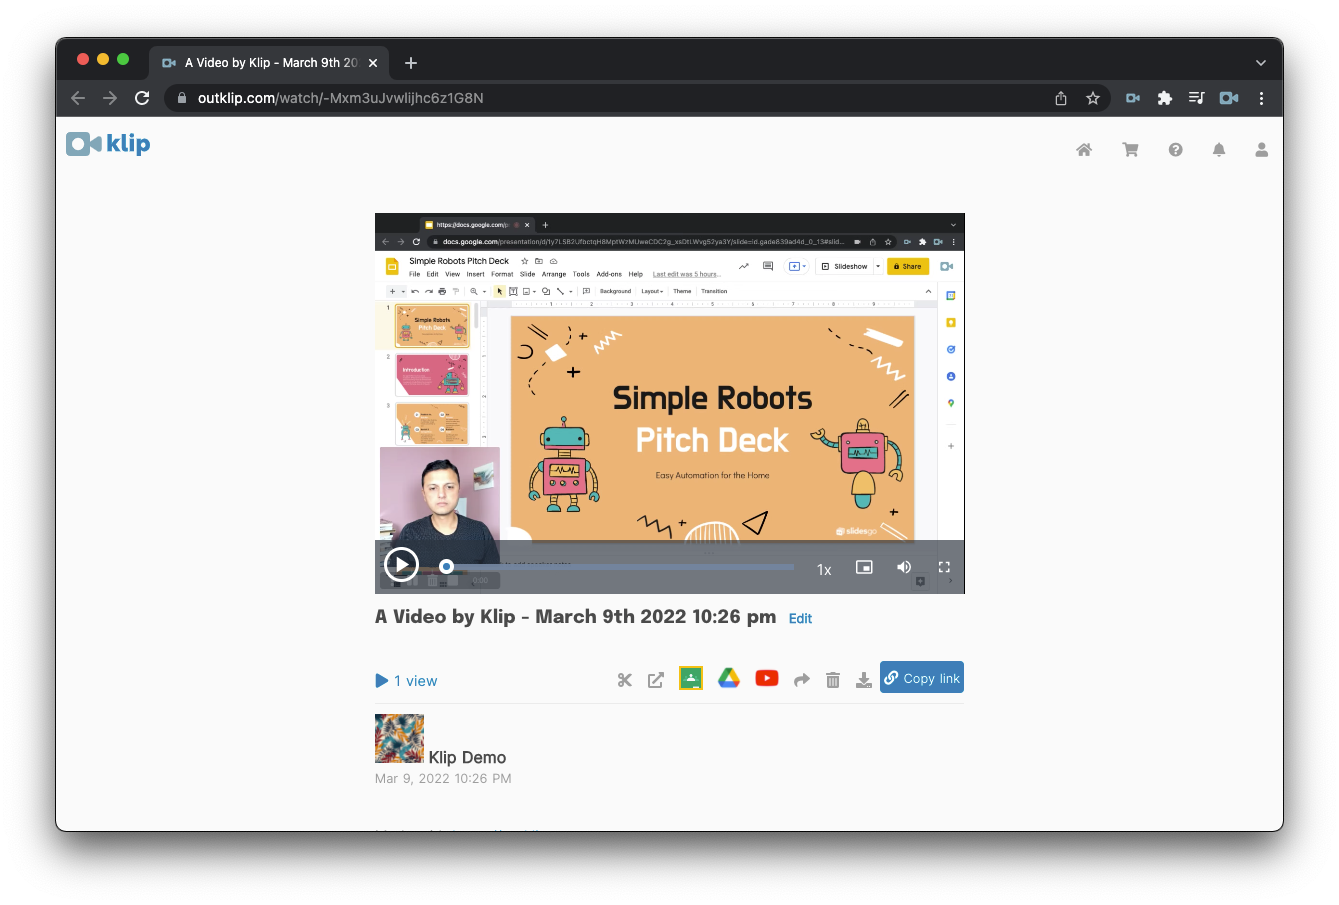
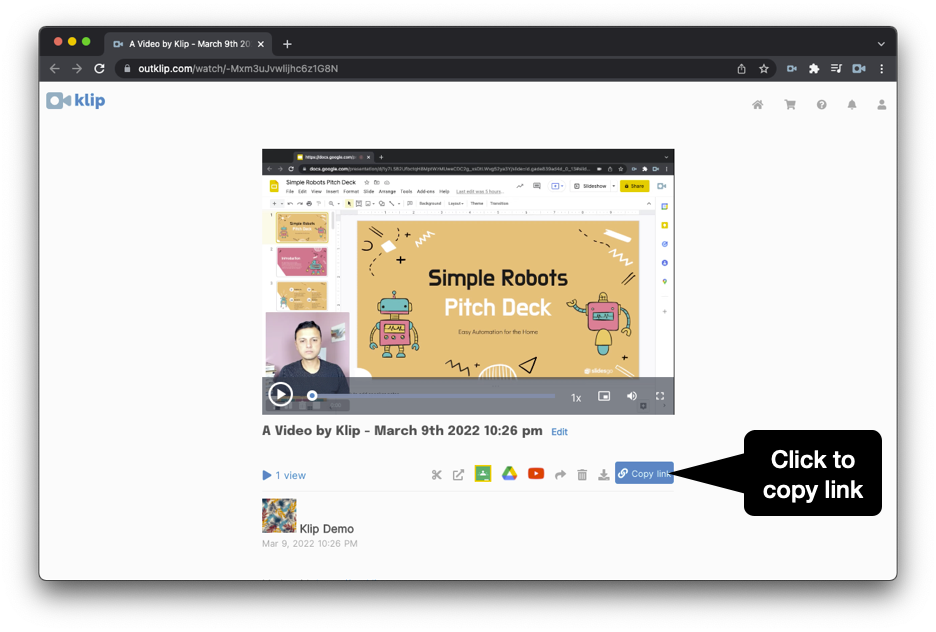
14. View recording
The video is automatically uploaded to outklip.com, where you can view it.
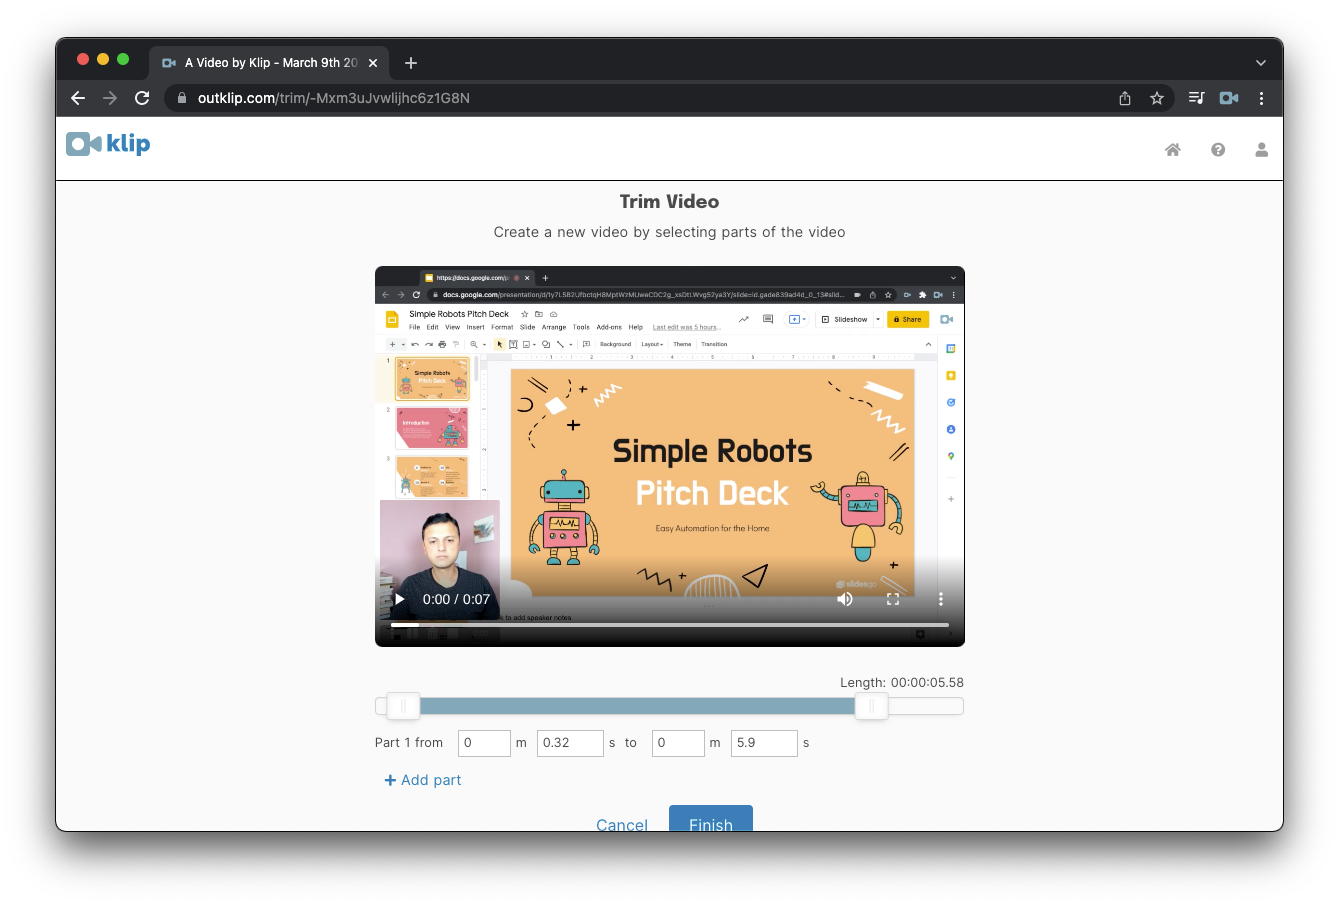
15. (optional) Edit your video
To cut out parts of the recording like the beginning, end or middle, use the Trim editing tool. To perform other kinds of video edits, Klip has several editing tools.
16. Share the video
After you’re happy with the recording, you can share the outklip.com link or download the video.
Bonus: Record Google Slides with auto-play
The steps described above require manually stepping through slides. If you’re not so keen on that, you could set up Google Slides to auto-play slides and record it.
Here’s how to set up auto-play. The following can be done during #10 in the sequence listed above.
1. Open the Google Slides slide deck
2. Click Slideshow
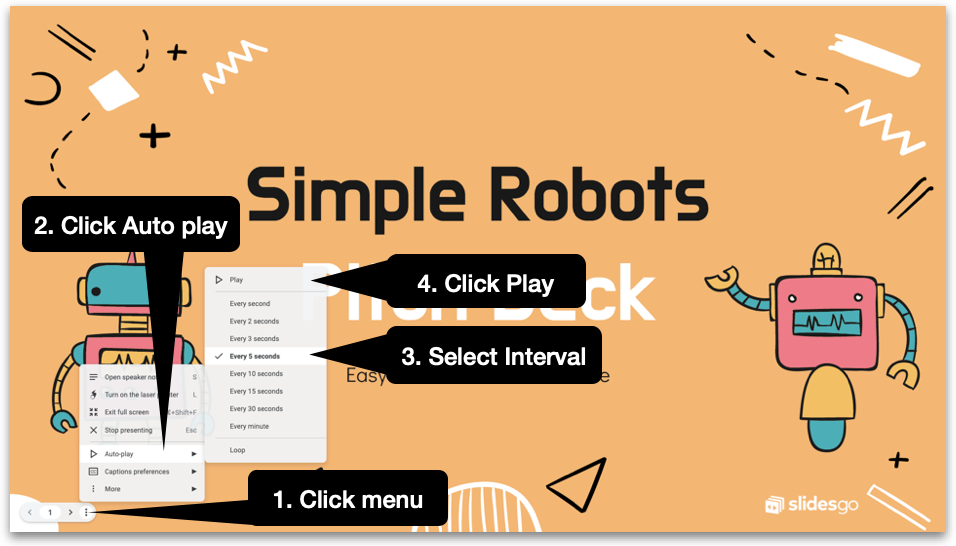
3. Move your mouse to the bottom left of the screen to activate the menu. Click the three dots icon.
4. Select the auto-play option and choose the slide interval: 3 seconds, 5 seconds or longer.
5. Click Play to start automatic slideshow
Recommendations for recording Slides with auto-play
- Skip voice narration: with a slide transition every few seconds, it’s hard to get your narration to exactly sync with the transition. It could take many takes to get it right. It’ll be much easier to add a voice soundtrack after recording.
- Skip camera: camera will look awkward without a voice over
The take-away
The steps above might seem long. After you make your first recording, you won't have to repeat most steps for future videos and the process will become simple.
Email Sunil at sunil@outklip.com